Watch the walkthrough
Hungarian narration · English and Hungarian subtitles
The screenshots show the Hungarian interface in our own demo account. Menu names are translated in the instructions below.
Before you begin
- A ChatAutomata account and an MCP client supporting Streamable HTTP, OAuth 2.1 and PKCE.
01Open settings
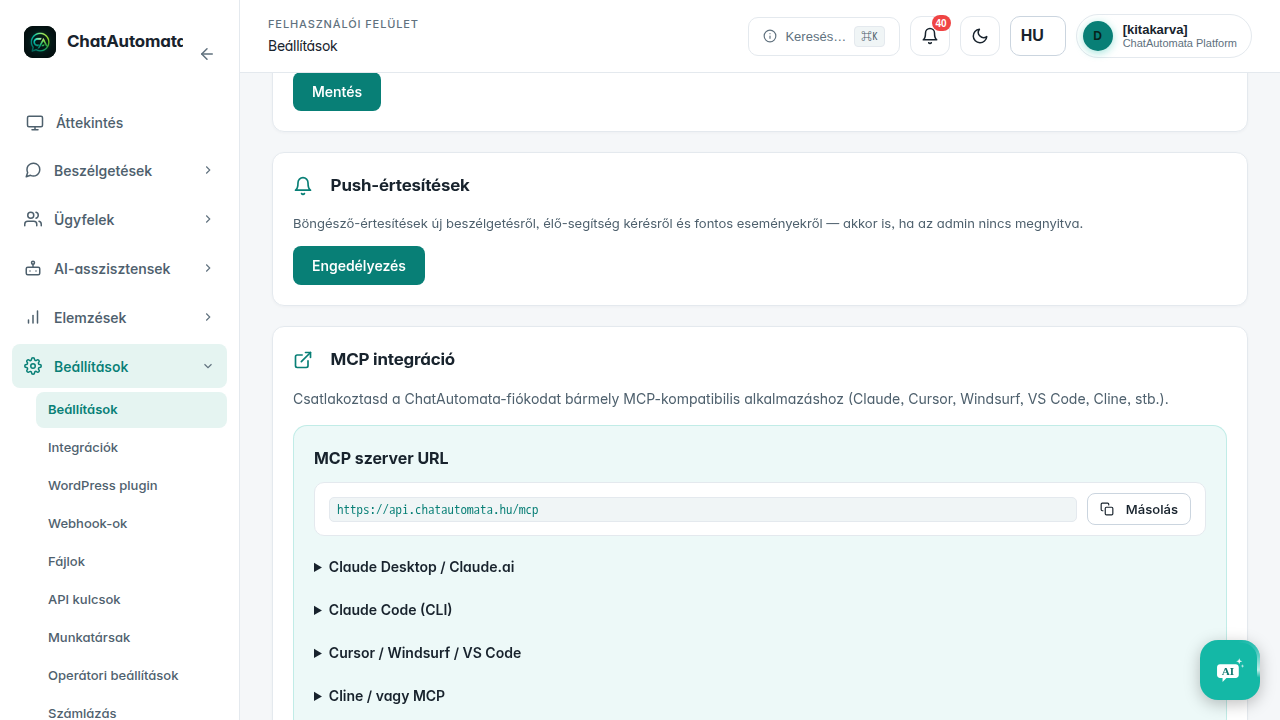
Go to Settings → Settings and find MCP integration.
02Copy the server address
Copy the MCP server URL: https://api.chatautomata.hu/mcp.
03Add it in the client
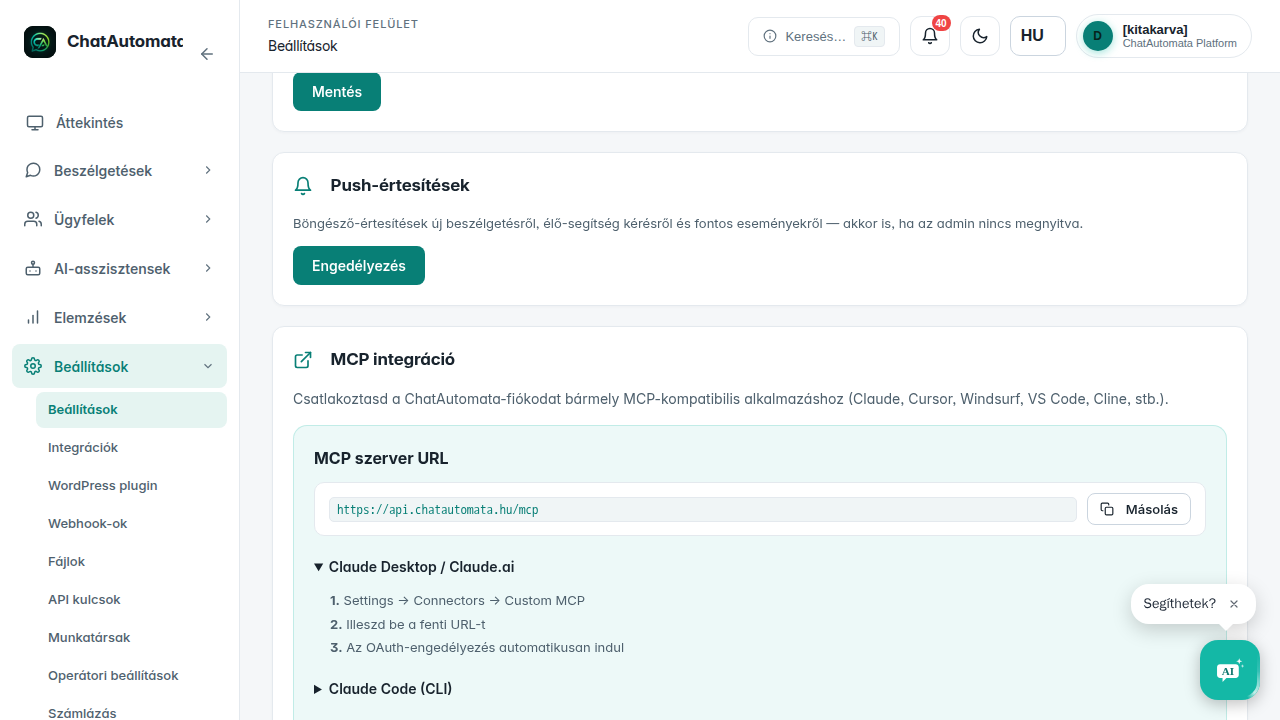
Enter the address in your MCP client’s custom connection settings. The client interface may differ.
04Authorize access
Follow the authorization page opened in your browser. Review whether the application requests read access or permission to make changes. Do not paste your login password into an AI conversation.
05Manage the connection
Review the connected application under Active connections. If you no longer use it, select Revoke to remove its access.
Check your result
- The client appears as a connected application.
- The granted scopes match the intended use.
Questions & answers
Does a revoked connection remain active?
No. The entire connection ends and the application must be connected again.
Read the video transcript
Connect an AI application with MCP.
Open settings. Go to Settings → Settings and find MCP integration.
Copy the server address. Use the Copy button to copy the MCP server address shown on screen, then paste it into your application’s settings.
Add it in the client. Enter the address in your MCP client’s custom connection settings. The client interface may differ.
Authorize access. Follow the authorization page opened in your browser. Review whether the application requests read access or permission to make changes. Do not paste your login password into an AI conversation.
Manage the connection. Review the connected application under Active connections. If you no longer use it, select Revoke to remove its access.